Add or replace a photo on my website
Great photos encourage visitors to explore your site, and you have access to a huge library of royalty-free images, searchable by keywords. You can also upload your own photos, formatted as .png, .jpeg/.jpg or .gif. Animated .gif files will not work. While files can be as large as 30 MB, smaller files load faster on your site.
Note: To add or change product photos in your Website Builder Online Store, add or modify a product.
- Go to your Secureserver.net Domain Name Web Hosting product page.
- Scroll down, expand Website Builder and select Manage next to your site.
- Select Edit Website to open your website builder.
- To add a new photo, you'll first need to add a section that uses photos, such as a content section, a photo section, a quote section, etc. Your new section will start with stock photos based on your site business category.
- To replace an existing photo, select it. In the right pane, select Change image.
- Select from recently added images, royalty-free stock images, collections, social media images and more. Once you've chosen your image, select Insert.
- To find stock photos, use the search box in the upper-right corner. This finds images based on keywords in both your own uploaded images and thousands of stock images.
- To add your own images, drag and drop them anywhere on the Recentlyl added area or select Add images, and then browse your computer to find the image and upload it.
- Scroll down to see more options, such as images from your social media accounts or your media Library.
- If you like, you can edit the photo. Remember to add an image description to help with accessibility and getting found on search engines.
- When you're finished editing, select Done.
- Publish your site to make the changes live.
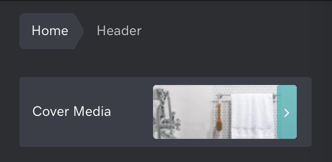
Note: To change the image in your header (the very first section at the top of your home page), select your header then select Cover Media.
More info
- Add or change my website's photo gallery
- Add or modify a product (including the photo) in your online store.
- Dive in: Browse essential Website Builder articles